Tuesday, February 26, 2008

Easter Egg Baskets Challenge

I have a real treat for you today. I found these while searching the net looking for a basket to make for a Easter project. I found this and fell in love! What a cute and easy idea. The pattern is on the site. I will share the site in a few seconds here. But, if your wanting to get things going for Easter this is the real treat to make.
If you are demo for stamping and doing stamp camps this project is so easy and quick to to. Or if you making something cute for your table or say a place setting for guest this is really cute. I am going to challenge all my readers to make a basket and share it. You can share by posting on your own blog and linking it here or by loading to SCS and giving a link here in the comments area of this message only. When posting to SCS put in EBC1 in the keywords.


I also have another treat in store for you. I made a bunny to go on my basket made out of SU Punches. And yes you can do this he is real easy to do and turns out so darn cute. So dig out those punches and card stock and lets play.

Ok starting with the Egg Basket you will need Heavy Designer Paper or Card stock.

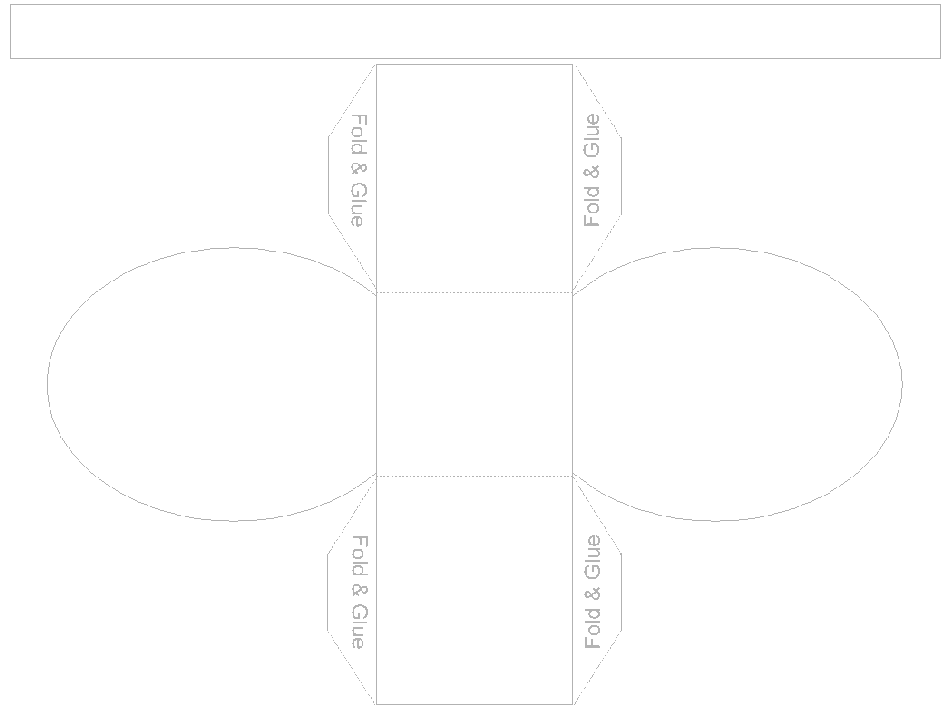
Now you can't print this pattern from the website and get the correct size so download to your computer and when you print it out do it in landscape. Then you will get the correct size for making this Easter Egg Basket. With that said go to Art 4 Crafts and get the pattern downloaded and printed out. Trace and cut out your pattern. Putting the basket together is pretty self explanatory. Then I did a strip about 3/4 inch wide and about 10 inches long for the handle made out of the same print. Set aside and dig out supplies for the bunny.


Punched Bunny Supplies Needed:

1 3/4" Round Punch

1/2" circle punch

1/4" circle punch

Large and small Oval Punches

White Gel Pen to highlight eyes and nose

Card stock of color choices, I used Choc. Chip, Pretty in Pink, Black, White and craft.

Marker to make dots for Whiskers

Pop dot cut in half.

Punch out 1 3/4" out of Choc. Chip

Punch out 2 of the Large Oval in Choc. Chip for ears

Punch out 2 of the Small Oval in Pretty in Pink for ears

Punch out 2-- 1/2 circles in craft for cheeks

Punch out 2--1/4" black for eyes and one in Pretty in Pink for nose

With a tiny piece of white card stock cut two small pieces for teeth.

Follow my sample for placement. Then bend one ear down, use a small piece of pop dot for hold his ear down and give him some dimension. With marker add little dots to his cheeks for whiskers.
Add highlights with gel pen to eyes and nose. Let dry a bit so it don't smear. With pop dots add to basket. Now my ribbon refused to stay on when I put him on the basket so try some crystal effects and maybe it will stay. I need to do that to my basket yet. Or he really looks just fine without the ribbon.
Hope you enjoyed and I will be looking for all your baskets.
Angel Hugs


Monday, February 25, 2008

Blue bird Birthday

I made a really simple sketch for tomorrows challenge on the groups I am on. My drawing needs a little to be desired. But I tried anyway.

Supplies needed:
Whisper White, Night of Navy Card stock
Night of Navy Ink Pad
Stamp set of Choice.
Itty Bitty Background stamp set for background
Scalloped punch
sm. corner punch
Chalks


Cut card stock to 5 1/2 x 8 1/2 will end up being 5 1/2 x 4 1/4 when folded
Stamp with NON Ink and dotted background stamp on this. Kind of looks like the dotted Swiss material don't it?
Next with WW cut a piece that measures 2 3/4 x 5 1/2, Stamp Happy Birthday on the Right side centered. I know mine is off but I tired. With a small corner rounder take off the little case around it and start punching your scallop all the way across the bottom.
Cut NON card stock at 3 x 5 1/2, mount this to the main dotted card.
Layer the white scalloped piece on the NON.
Stamp your image on a circle to go inside your scalloped circle, with image of choice and color in.
Punch out of NON card stock the scalloped circle. Layer your stamped image on this and then onto the card.
This card is so simple to make and I think it looks pretty good for being a simple design.
Hope you enjoyed today's project.
Angel Hugs


P.S. Stay tune to tomorrow for a really neat Easter basket.

Sunday, February 24, 2008

Script Heart

This is Julee's Sketch Challenge for the week on her blog. Check it out. She does awesome work.
I know this is the same image as yesterday but it worked so well for this sketch I think.
Supplies Needed

Pixie Pink, Glossy White, Black Card stock
Black Ink, Garden Green Ink, Pixie Pink Ink
Cuttlebug embossing folder called Swirls
Designer Paper retired from SU
Markers and Blender Pen
Pretty simple just follow the sketch.

Saturday, February 23, 2008

Post it Notes!

I got this idea from my friend Chrissy, you can see hers on her blog. I love having my post it notes handy and also decorated cute for my purse or computer stand. These make cute quick gifts when needed.

These turn out so cute and are quick and easy to make. Think I will be making more of these.


Supplies Needed:


Post it Notes


Card stock cut to 8"x 3 3/4" then layered how you wish.


Scored at 3 3/4" x 4 1/4"


Ribbon cut to the size you can make a bow with that is easy workable for you.


I used the stamp set which is retired but still beautiful Script Heart. The heart in this stamp set is so pretty and elegant.


I colored my image in with blender pens and markers. The roses are really the same color as the card stock but it isn't showing that way. Did I ever mention I don't like my scanner?


On the Burgundy Card stock I used versamark and added a smaller heart that is in the set to add tone on tone to the base of the holder.


I added my ribbon by using small zots clear adhesive dots. They are really tiny and work well with narrow ribbon.


I scribbled marker colors of choice on a piece of acetate and took my blender pen, picked up color and colored in my images. This was stamped on Glossy White Card stock. Then when it was all colored in I trimmed around the heart with my scissors and added several pop dots to the back and centered in the middle of the post it holder.


Add your post it notes to the inside, tie the ribbon in a bow and your done.


How cute and useful is that!


Angel Hugs


Friday, February 22, 2008

Anniversary Wishes

Anniversary wishes are for a great set of friends we have who are celebrating 24 years of marriage. Yeah! Congrats on the many years Mark and Lu and hope you have many more happy years together.
Supplies Needed:

Heaven Scent, Flower Garden Stamp sets

Garden Green, Black and White Glossy CS

Black Ink Pad and White Craft Ink

Chalks and blender pen to color in

Black Organdy Ribbon

I first cut the Garden Green card stock at 5 1/2 x 8 1/2 and folded in half, then took my dotted background stamp and stamp with white craft ink to make it look like baby's breathe on the green.

Next I cut White Glossy cs at 3 1/2 x4 3/4 and one at 2 x 3 1/8, stamped on the large piece with Roses in Black ink, colored in with chalks and blender pen. Mounted this on black cs cut 1/4 inch larger to give a highlighted edge on it. Then stamped the single rose on a stamp in black and colored in with black ink and mounted this to black like the first part. 1/4 inch larger for a highlighted edge. Really makes it stand out.

Then I added my black ribbon to the larger piece, tied a bow put a small adhesive dot behind the knot so hold in place. Mounted this to the green base card and then mounted the smaller one to that.

I think it turned out rather well and really hope our friend enjoy their Anniversary card.

Thanks for stopping by

Angel hugs

Wednesday, February 20, 2008

Pearl Ex Birthday

I got another Birthday card in the mail today and had to share. I think this is so pretty and it came from my friend in TX, Sharron Wood. Thanks Sharron for thinking of me.

Tuesday, February 19, 2008

Honey Bunny

Another sketch challenge. I think this one is one of PoeticArtistry's sketches but not positive. If not someone please correct me so I can give proper credit.
I changed some of the sketch as I didn't have any oval scalloped punches. So I did my own thing.
Once again my scanner has a mind of it's own when it comes to the colors it shows. Real color combo is below.
Supplies needed:
Whisper White, Pixie Pink cs
Designer Paper, don't remember the name of this one it is retired.
A New Little Someone (retired SU)
Retired background stamp
Chalks
Brads
Pop Dots
Word Punch
With WW cut at 5 1/2 x 8 1/2, and one at 2 x 5 1/4
Designer Paper is cut at 1 3/4 x 5 1/4
Pixie Pink is cut at 5 1/4 x 4
Punch two word punch pieces out of WW

Stamp bunny on WW and color in with chalks or desired coloring method. Cut out and add pop dots to back.
Stamp Pixie Pink with Versamark and little background stamp of choice.
Fold word punch pieces in half and add to card as shown. Add brads.
Mount the PP on the WW main card.
Layer the designer paper on the smaller WW piece and layer onto PP in the center.
Add bunny, by removing pop dots.
And your card is finished. Really fun and easy to do and so bright, it can be used as a Birthday Card for a child, Baby Announcement, Easter Card or Baby Card.
Hope you enjoy today's project.
Angel Hugs

Monday, February 18, 2008

Punchy Leprechaun


On SCS I seen a card I had to make. My Mom is full blooded Irish and I had to make this card for her. Wish I would of had a smaller circle punch for his nose but he looks ok. Anyway, Emmy, sent me this link to get the directions for the Leprechaun, she had also made one and shared on SCS. Jodie Vasbinder, is the creator of this Leprechaun and did a wonderful job. While you are checking out the directions for this card take a look at Jodie's other creations.

He was so much fun to make. I have been in a slump lately and not been stamping and when I seen this little guy I just had to give it a shot. So thanks Emmy and Jodie for bringing me out of my slump. So what do you all think of my Leprechaun?
Luck of the Irish to you.
Angel Hugs

Sunday, February 17, 2008

Birthday Cards I got

My Birthday was Feb. 16th. and thought I would share a couple of cards I got from friends.
First card is from Ms. Holly . Thank you Holly for the beautiful card. Check out Holly's blog when you get a chance.


Next is from my friend Chrissy she also sent me a beautiful card. I was so lucky to get so many pretty cards. Be sure and check out Chrissy's blog to when you get the chance. Thanks for the card Chrissy.


This is a card from Shelly another friend of mine. Aren't all these cards so pretty?
Thanks Shelly.

I also got a great card from my best friend in the cities LuJean and Mark. I have to scan that one yet. But, they have Alan Jackson on the front. He is my favorite singer. Love that card also.

I got some goodies too, my best friend got me the Big Bite Crop-a-dile and a angel stamp plus some scrap booking supplies. DH and kids got me some Nestabilities the Rectangular ones. And dd that works at the DQ got me a yummy DQ Cake.

Hope you all enjoy my cards.

Angel hugs

Friday, February 15, 2008

Shadow Box Valentine

I made this shadow box card for Lori for a Valentine Swap I was in on MNstampers group. I had forgotten to take photo's of the card before sending to Lori, but she was kind enough to share the photo with me so I could post to my blog and show you all just how easy Dawn's tutorial is.
Hope you enjoy, directions are in Dawn's tutorial below.

Stamp set used is retired SU but still love it as it has angels in it. This set is called Wings of Love.

Enjoy

Angel Hugs