 I have a real treat for you today. I found these while searching the net looking for a basket to make for a Easter project. I found this and fell in love! What a cute and easy idea. The pattern is on the site. I will share the site in a few seconds here. But, if your wanting to get things going for Easter this is the real treat to make.
If you are demo for stamping and doing stamp camps this project is so easy and quick to to. Or if you making something cute for your table or say a place setting for guest this is really cute. I am going to challenge all my readers to make a basket and share it. You can share by posting on your own blog and linking it here or by loading to SCS and giving a link here in the comments area of this message only. When posting to SCS put in EBC1 in the keywords.
I also have another treat in store for you. I made a bunny to go on my basket made out of SU Punches. And yes you can do this he is real easy to do and turns out so darn cute. So dig out those punches and card stock and lets play.
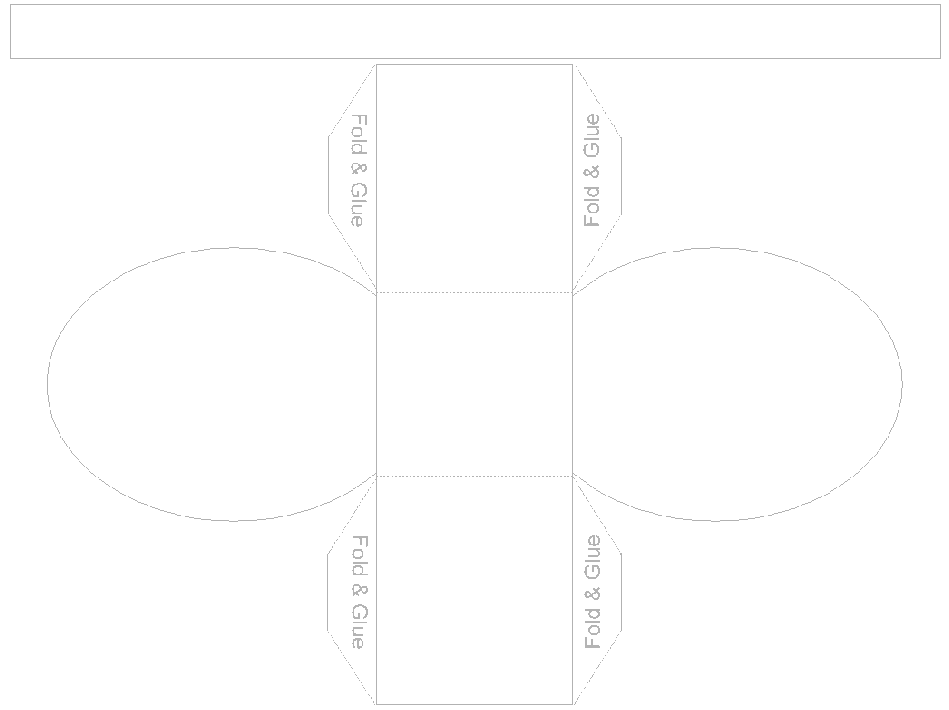
Ok starting with the Egg Basket you will need Heavy Designer Paper or Card stock. 

Now you can't print this pattern from the website and get the correct size so download to your computer and when you print it out do it in landscape. Then you will get the correct size for making this Easter Egg Basket. With that said go to Art 4 Crafts and get the pattern downloaded and printed out. Trace and cut out your pattern. Putting the basket together is pretty self explanatory. Then I did a strip about 3/4 inch wide and about 10 inches long for the handle made out of the same print. Set aside and dig out supplies for the bunny.
Punched Bunny Supplies Needed:
1 3/4" Round Punch
1/2" circle punch
1/4" circle punch
Large and small Oval Punches
White Gel Pen to highlight eyes and nose
Card stock of color choices, I used Choc. Chip, Pretty in Pink, Black, White and craft.
Marker to make dots for Whiskers
Pop dot cut in half.
Punch out 1 3/4" out of Choc. Chip
Punch out 2 of the Large Oval in Choc. Chip for ears
Punch out 2 of the Small Oval in Pretty in Pink for ears
Punch out 2-- 1/2 circles in craft for cheeks
Punch out 2--1/4" black for eyes and one in Pretty in Pink for nose
With a tiny piece of white card stock cut two small pieces for teeth.

Follow my sample for placement. Then bend one ear down, use a small piece of pop dot for hold his ear down and give him some dimension. With marker add little dots to his cheeks for whiskers.
Add highlights with gel pen to eyes and nose. Let dry a bit so it don't smear. With pop dots add to basket. Now my ribbon refused to stay on when I put him on the basket so try some crystal effects and maybe it will stay. I need to do that to my basket yet. Or he really looks just fine without the ribbon.
Hope you enjoyed and I will be looking for all your baskets.
Angel Hugs