Showing posts with label Ornaments. Show all posts

Monday, December 3, 2007

Look what I got in an ornament exchange....


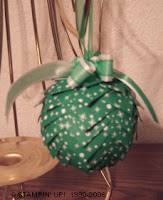
I so love this little guy. Isn't he just the cutest? Tracy made him and sent him to me. On one of my yahoogroups we did a ornament exchange that lasted all year. I think January is the end of it. I made 19 ornaments and sent them out. Well 18 I have one left to send. Sorry Bev, but it is coming. I made an extra ornament for a friend the ornaments I sent was the snowflakes and the pine cones. You can see them else where in my blog.
I have to find some white bulbs for making these and make some for next year. I am sure I can find the bulbs after Christmas and much cheaper.
Hope you enjoy him.
Angel Hugs

Sunday, November 18, 2007

Peace Christmas Bulb


Another really easy ornament to make. This one is made from a 3 1/2 inch round coaster. I used Mod Podge to the coaster and placed my designer paper over that, let dry and trimmed around. Did the same on the other side. This stuff makes it stick real good. Next stamp your image or images on whisper white card stock and and mount to matching card stock, in this case it was real red. I made mine a little longer than needed so I could trim them once glued on. Glue one side at a time and turn and trim from the other side so you get it even. Do the other side the same, trying to match up on the edges.

Then I punch out a tab punch and folded in half, used my crop-a-dile and punched holes for eyelets for the bulb holder. I did on all sides (4) total. Then set my eyelets and then did another hole in the center top and set that eyelet, glued on top of my ornament and then put fishing line through to hang with. That's it, it is that simple. And they turn out so cute! Next one I think I will run the tab punch through the crimper instead of doing the eyelets, think it will make it look more real.
Hope you enjoyed today's ornament.
Angel Hugs

Thursday, November 15, 2007

Easy Six Pointed Star


Another ornament for you to make. I got the tutorial on them from the Paper Pleasing blog. She has done an excellent job on this video and it is so easy to follow. Check it out and make some of your own.


I did do mine a little differently and added a eyelet at one of the points for threading my cording through for hanging on the tree. I figured it would have less of a chance to tear this way. On this red one I used a white eyelet to match the white in the words. On the blue one I used a blueish colored eyelet to match in. Now remember when doing these that you can have them different sizes. Depends on the size of your paper you cut out and how you cut your angle. Mine both turned out different and I used the 6x6 piece on both of them. Just cut my angle different.


So for this you will need either an eyelet setter and punch or your crop-a-dile. I use the crop-a-dile as it is one of the best tools I own. My oldest son got it for me last year for a Birthday present and I just love it. I also use the red liner tape for taping mine together it really is strong and holds really well.


So what are you waiting for go get out that designer paper, crop-a-dile, cutter and get going and make some of your own to embellish your tree this year. I am thinking I will be hanging mine from the arches in my doorway instead of my tree.

Again thanks for stopping by. And I really hope these are giving you some ideas for your tree.

Angels Hugs

Wednesday, November 14, 2007

More Pine cone ornaments


I so love making these. Each one turns out so different and so pretty. They look awesome on a tree. I can't wait to get my tree up this year to display the ones I have made for myself and that my kids have made. Each of my kids also made at least 2 each and I have 3 kids. Each year when they are on their own they can put these on their own tree and remember the times we had making them together.


So with that said here is a few more and as promised the directions or the site I got the directions of for you to make your own.


Now the directions a great tutorial is on Amanda Sewell's blog, so check it out and make your own. Get your kids in on this one. Mine when we made these was 19, 16 and 11. And they did beautiful jobs on them. Your kids will to. Now if you make one for your Christmas gift for someone, please share with me. Just upload them to your own blog and link to my blog in the comments area. Or if you upload to SCS you can link that one here too. I would really love to see what all yours turns out like.

Hope you all had an enjoyable day. We had such strong winds here from late yesterday afternoon until just a bit ago and it is almost midnight here.

Thanks for stopping by. Check back tomorrow for another kind of ornament for you tree. Also made from designer paper and super easy to do.

Tuesday, November 13, 2007

Beautiful Pine cones


Just a quick one tonight as it is really late and I need to get to bed. But wanted to share some of the pine cones I have made and gave away already this year. Again most of these have went to friends on a yahoo group I am on for an ornament exchange. I will share directions for these tomorrow along with a few more I have made that have flowers on them.
These are so easy to make. The hardest part is the pushing in of the pins, it makes the fingers a little sore.
Thanks for stopping by.


Monday, November 12, 2007

More 3D Snowflakes


These are the same as yesterday only I changed a couple of things in them. I think I like it better this way. I punched a 1 inch image and then a 1 1/4 inch matching piece to layer on so it matches the snowflake. And then these are all in blue.


My best friend in the cities loves snowmen and also blue is her favorite color so one will be going to her and 1 will be going elsewhere and of course one will stay with me. I mean I have to keep one for myself right?


We had a beautiful day today in Central MN. It was in the mid 50's. I loved it today. Hope it stays this way for awhile but I am sure it won't.


Thanks for stopping by.

Sunday, November 11, 2007

Snowflakes 3D


You all have to try these snowflakes they are so addicting. I will be making more in different colors and will share them to I am sure. I hope you like these. These are all done in red designer paper from Joanne's in those big paper books they sell.


Directions can be found here. Very easy to follow. So take a look, dig out some paper and go and make some and share them here with me. Link them in the comments area to my blog or if you have loaded one to SCS and share them with me.
You will need the following for supplies:

Designer Paper of choice.

CS of choice for the framing around the snowflake

Small and Regular sized SU Tag Punches

And to make them sticky on the backs I used the X sized xyron. They fit perfectly in this little machine. Just gets a little annoying with the sticky when taking them off but so much easier than trying to glue them yourself.

I also used the glue eraser SU sells too, to get the glue residue off once all stuck together, this little glue eraser is worth it's weight in gold.

Some cording for hanging

1/8 inch hole punch

Thats it so now go and get started.


I have scanned these with all 3 that I made and then I did them singly. I will share both ways, this way you will see a close up of each one. These will be going out to some friends. They all like red so I made these for them.


I will share other ornaments I made with you through out the week. Most of them have been sent out to an ornament swap I was in starting the beginning of the year. So I don't need to worry about them seeing them before getting them. We did the ornament swap for a one year period this one ends in Dec. You all should do this on one of your yahoo groups or with some stamping friends and have something made just for you from them. What great memories they all hold.


So come back and check my blog out through the week and see the other ornaments made.


This whole week I will try to stick to ornaments to inspire you for Christmas.


Thanks for stopping by.


Monday, October 22, 2007

Santa Ornament

How about something different than a card for a change. I have been doing some ornaments or you can also use them as a gift tag. Which ever you do they go quickly.

For this ornament I used scalloped circle punches. On the white one I stamped Santa from the retired Old Fashioned Christmas stamp set. The Santa face in this one make perfect for this ornament. I stamped him in black and colored him in with chalks. This has a Santa on both sides so when he is on the tree he is seen on both sides. You can whip these up so quickly and have something cute to adorn your tree or packages. Punch a hole in the top making sure that your Santa's are upright and close to the same. Add some cord for you hanger. I am thinking to add some more to the ornament is to add some white gel pen dots to each of the scallops on the red piece.